

I’ve been wanting to strengthen my subframe for a while now after seeing pictures of a few cracked subframes on kawasakiforums. I tend to load up the rear and bounce the hell out of it.
A weak spot has been reported in the tube just past the coolant overflow tank.
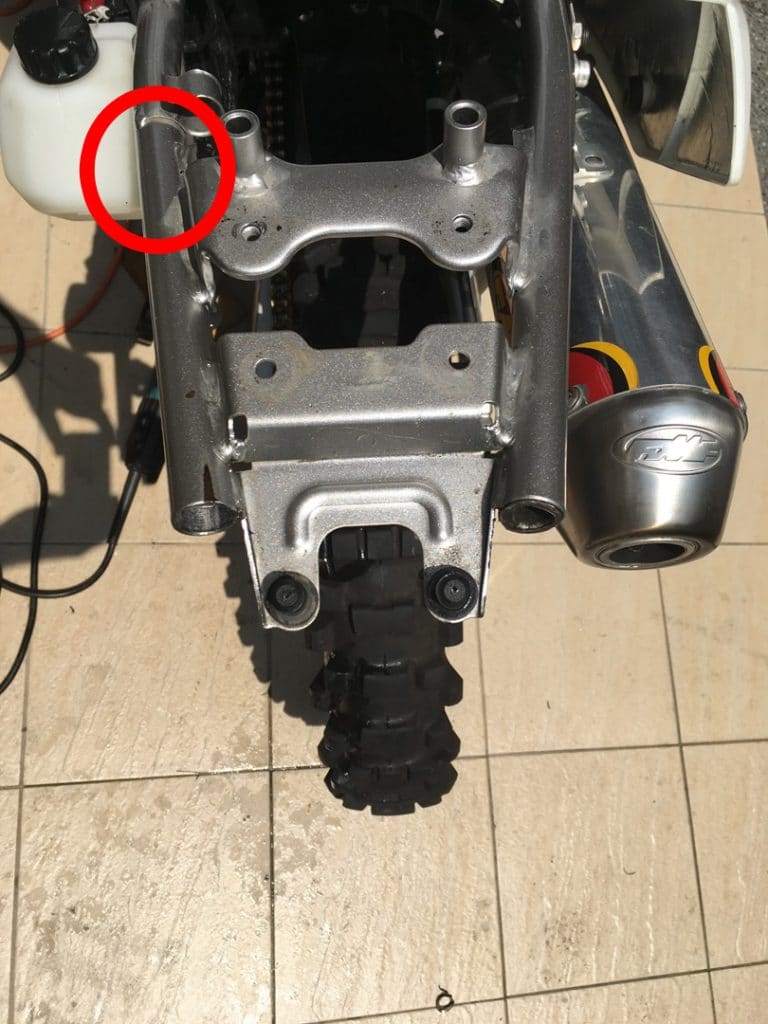
Also on the other side if you’ve swapped the OEM exhaust for an aftermarket. (only 2 bolts vs 3 with OEM) The OEM exhaust acts as a support. Looking at the subframe for the first time is a little scary!
Why would it break?
Loading up the rear and hitting the trails would be the main reason. Without any support, any weight put on the subframe will turn it into a springboard; slowly stressing the metal until it finally cracks. I tend to load up the rear with water, tools, etc. and ride hard at times. I think it would be a matter of time before it broke if I did nothing.
Another weak spot is where most aftermarket racks bolt on to. Using your rack as a handle to pull and drag your bike around has been reported to cause the metal to crack.
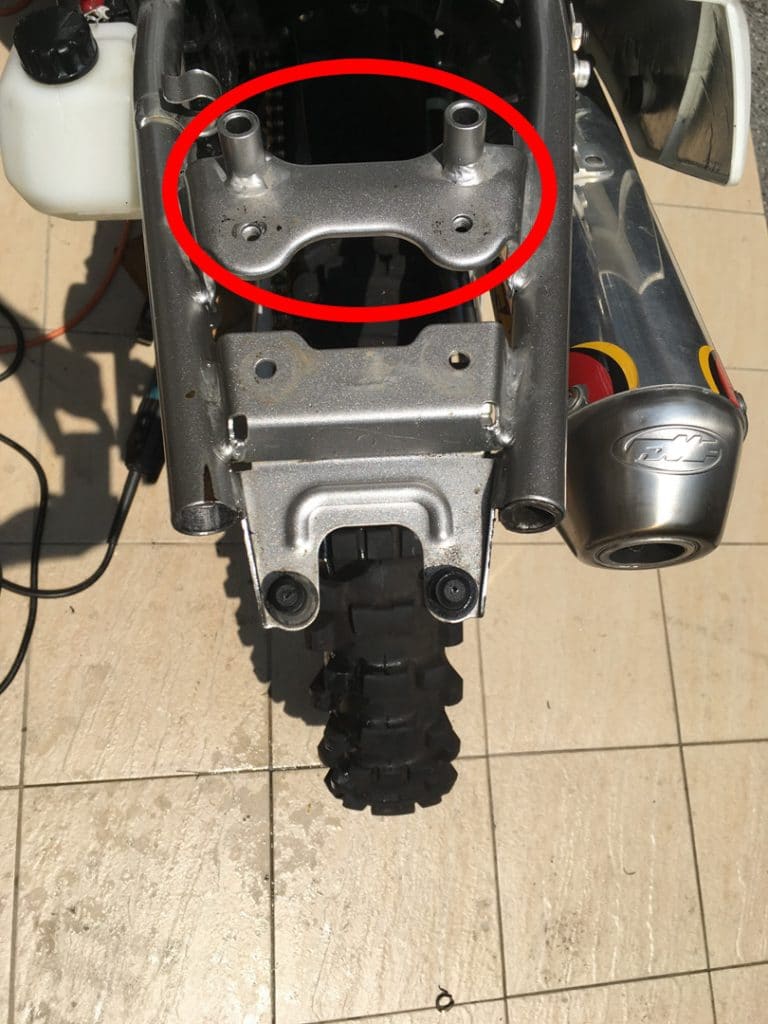
There are three possible weak points. I decided to tackle two of them: the tubes.
Welding a crossbar on the left side seems the best method for that side. Fabricating a plate for the right side–essentially recreating what the OEM exhaust was doing–is about the only thing you can do there. Inserting smaller tubing into the subframe should also help. Depending how thick you go, that might be all you need. Though I’m one to overkill everything. Better safe than sorry.
Living in Taiwan, I have a somewhat unique problem. Strictly speaking, it isn’t legal to modify your bike in any way. But many people do it. And other than some inspections/tickets for loud aftermarket exhausts, there isn’t much enforcement until you decide to sell your bike. Bikes here are inspected before the title is allowed to change hands. If the bike doesn’t look like the pictures they have on file, you’ll need to get busy undoing your changes.
Because of that, I didn’t want to do any welding. I needed a non-permanent solution.
So here’s what I did…
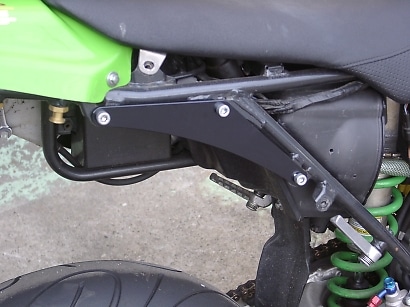
First I bought a pre-made brace for the exhaust side from Japan. Search “K&T seat rail reinforcement plate” It will look like this…
Several riders have fabricated their own. It shouldn’t be difficult to do.
Second, I drove tubing into the subframe tubes.
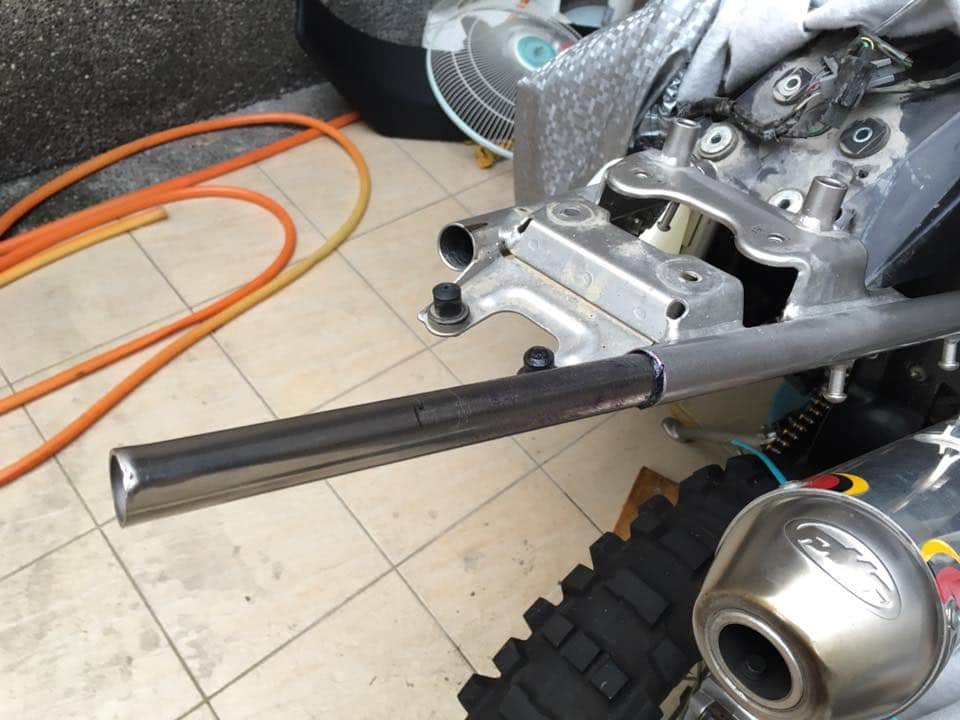
All I could find locally were stainless steel tubing at 1mm and 1.5mm thickness. Actual thickness was more like 1.3mm and 0.8mm. I had decided to go with the thicker of the two but it was hard as hell to drive in. So I went with the thinner tube on the left side since it would have a brace helping out anyway.
One thing to note, I was told it might be a good idea to pre-bend the tubing before driving it in, though maybe not necessary. In the end I couldn’t find a good way to bend it with what I had, so I didn’t do it.
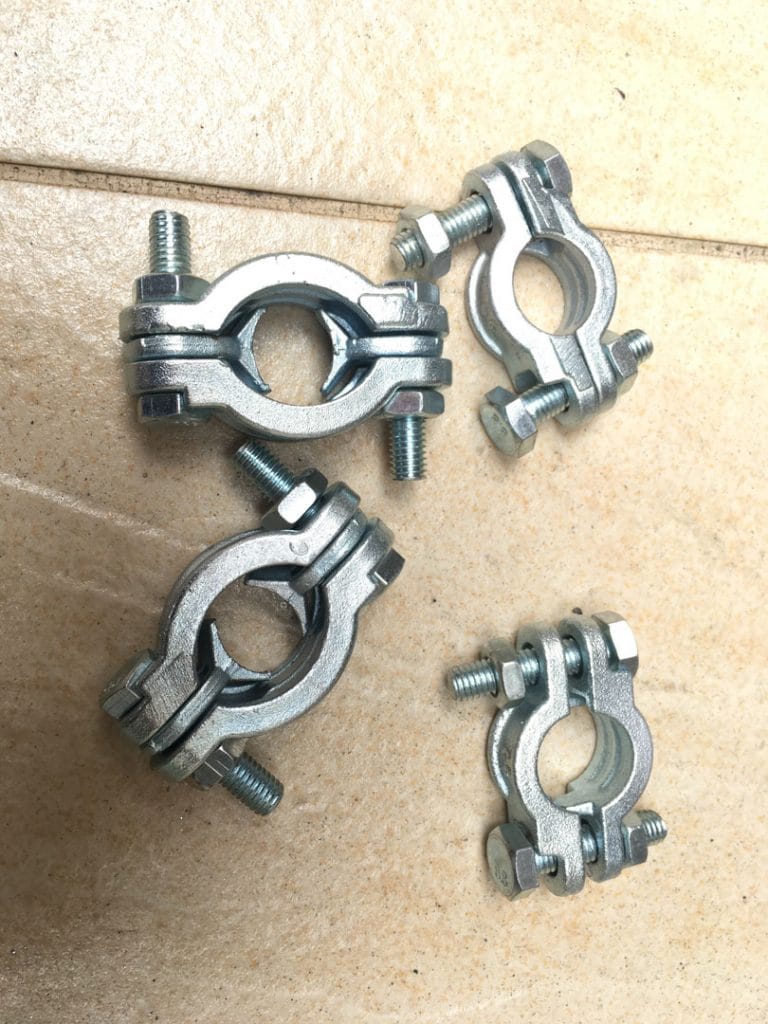
Finally, I made up a brace for the left side. The only thing I could find suitable for a non-permanent solution was these pipe clamps.
I had some old air conditioner window framing lying around and figured I could use it for the brace. After some trimming with an angle grinder, here’s the mock-up.
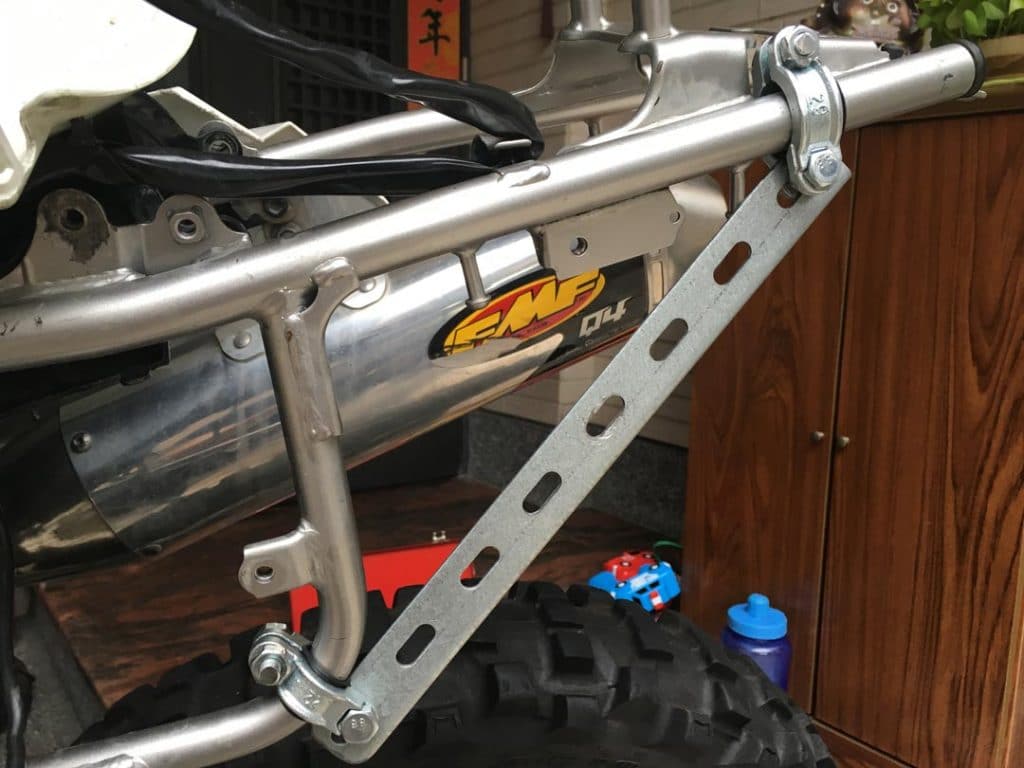
It’s difficult to tell from the picture, but this brace has an “L” shape. This will be much stronger than a straight piece of metal. Also, this was the only location I could find to connect the brace. On the bottom you have the coolant overflow tank blocking a connection to the tube. And for the top, there was nowhere else to go. I needed to bend that little tab to the right of the helmet lock to get the brace to fit. It cracked the paint. I’ll repaint that later.
I can’t take credit for this idea. This was my inspiration: http://www.webbikeworld.com/suzuki-dr-z400s/frame-brace/
After some painting, the finished product

The plastics all fit back on without much problem. Though I needed to shave down one of the bolts. It was preventing the fender from properly fitting.
As the guy on the Suzuki page said, I’m not sure if this is a good idea or not (the left brace). Maybe all that force will end up breaking the tube at the bottom of the brace…or some other unforeseen problem might pop up. I’ll update this page over time to let you know how it works. Let me know if you have any suggestions.
***UPDATE***
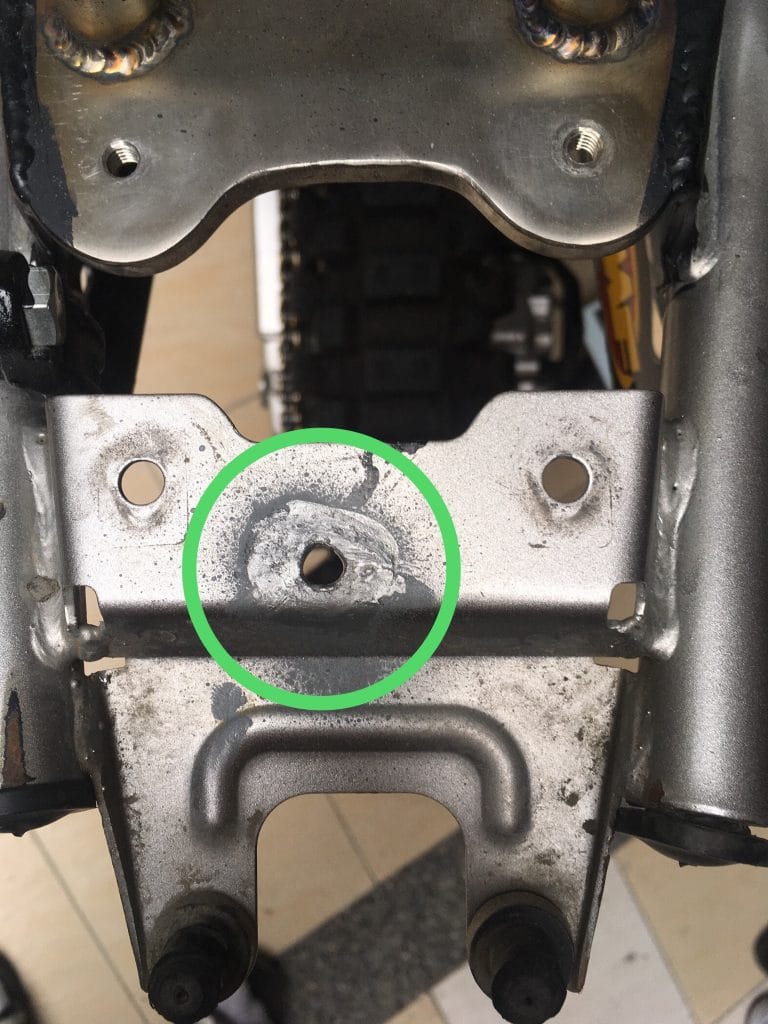
About seven months after this post I managed to crack the brace that goes between the tubes.
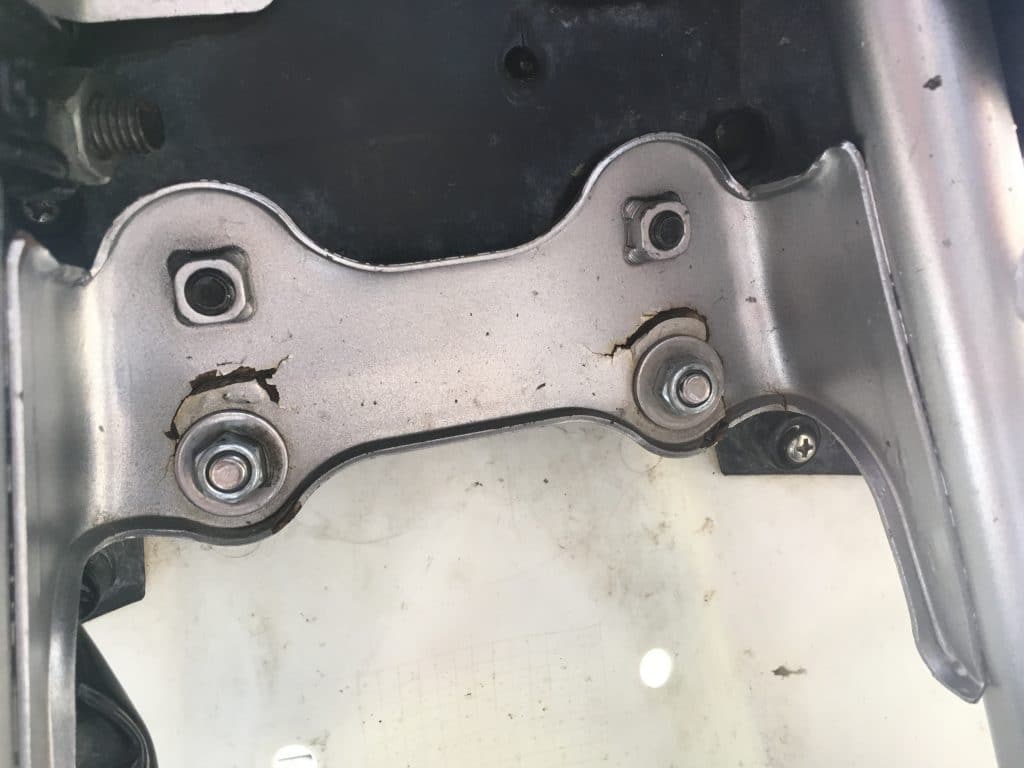

This is where my PMR rack attaches. Obviously I had too much weight on it and all the springboarding effect took its toll. For the record, i believe it cracked when I had a one gallon rotopax and drybag on it.
Lucky for me, I have a buddy who works at a stainless steel parts manufacturer for yachts. I took it to him and he had a worker fab up a new piece and weld it on for me.
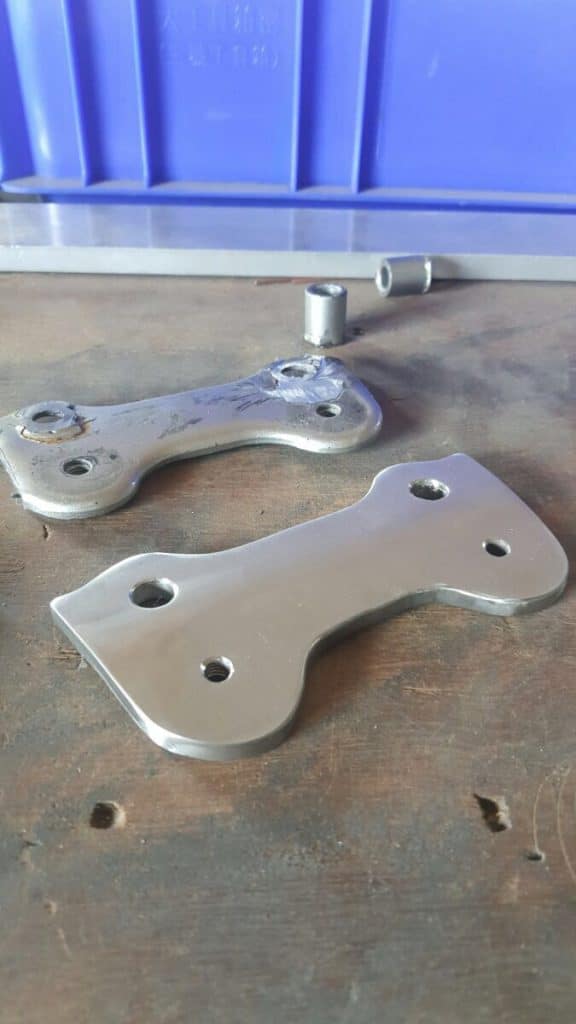


The new plate is a lot thicker than the original. The fit was perfect. The worker thinks it will never break. But I was still a little worried so I took one last step.
The PMR rack attaches via two points at the top. I contacted PMR asking if there would be any problem adding a third point. They said no problem at all. So I drilled a new hole for the third point of contact here.
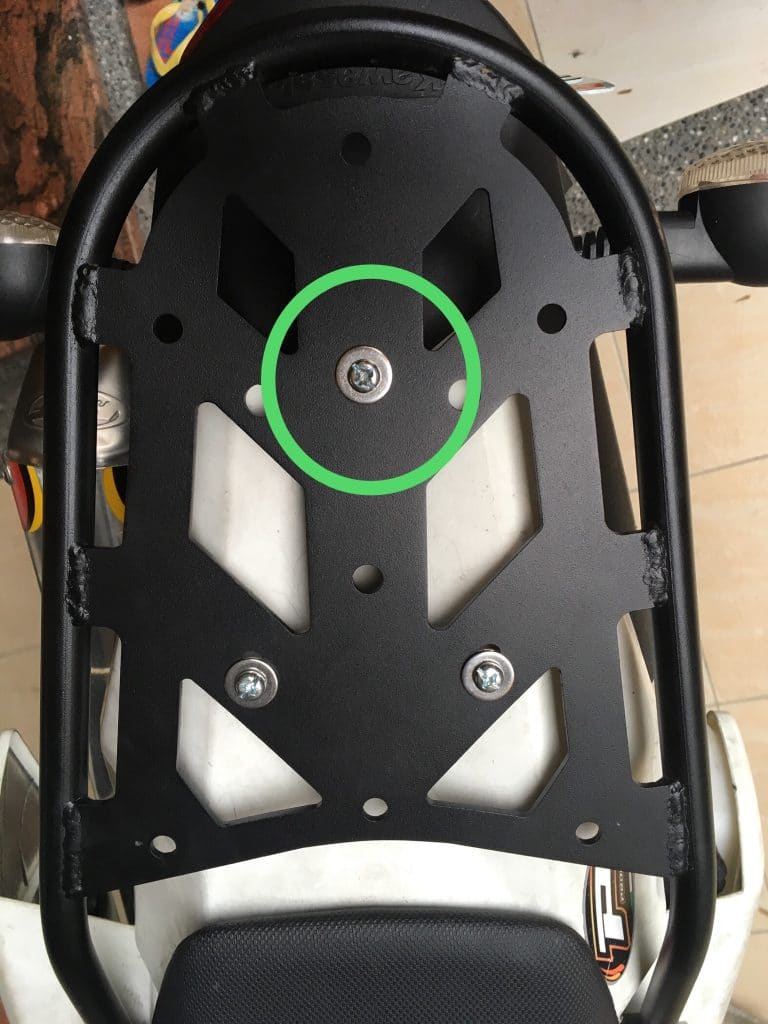
You’ll need a spacer to sit between the rack and the frame. I used spacers left over from my first PMR rack that broke. They weren’t long enough, so I cut one down and used two.

What had me worried was the cross-plate for this new point of support. It’s rather thin and obviously not meant to bear a load. I thought for sure it would crack at some point.
What I did (and I’m not entirely sure this would work) was add a metal plate on top of the cross-bar to help spread the load.

The spacer sits on top wider than the hole. The piece of metal is something I had lying around. The hole was already there. Otherwise I would have drilled it smaller.
So far this has worked. It’s been almost a year and no problems. To be fair, I’m also more careful about how much weight I put on the back. No more rotopax for sure! Though I have loaded it up pretty heavy for some camping trips. So far so good. Will report back if any changes.
*Update*
As of today, 18 April 2019, my subframe is doing just fine. No problems to report.


![[Valid RSS]](https://outrecording.b-cdn.net/wp-content/uploads/2020/03/valid-rss-rogers.png.webp)
發佈留言